Saturday, January 30, 2016

Breeding Better Looking Birds Part 5 - White Colored Birds

White canaries are either genetically dominant white, carrying a dominant white gene which is expressed and on the other chromosome a recessive yellow color gene, or recessive white which is white colored because it carries two recessive white genes. The dominant white can be differentiated from the recessive white because a dominant white has noticeable yellow coloring on the side of its wing. On some it is a very small area but it is visible to the naked eye. The presence of the yellow coloring on the wing of a dominant white bird is genetically independent from the feather characteristics. The yellow coloring on the side of the wing is only used to determine whether a white bird is a dominant white or a recessive white but not its feather type.

Note the yellow coloring on the side of the wing of this dominant white border
 A dominant white,  yellow feathered bird has yellow coloring bleeding through the white color on the body feathers, especially noticeable around the face and head when you hold it up close.

,
From a distance looks like variegated white Border. But is it Buff or Yellow Feathering?

Note the Yellow color bleeding through the White color which is typical of Yellow Feathering.
White colored Irish Fancy. But is it Buff or Yellow Feathering?

Looking only at the feathers in the face, it is clear that in the cheek area, yellow color is bleeding through and that makes the bird Yellow Feathered.


Variegated Columbus Fancy, Is it Yellow or Buff Feathering? Note how white colored its white feathers looks even up close and how the dark colored feathers are lighter?

No yellow color bleeding through, it is very white even up close so it is Buff feathering in this Columbus Fancy.


Recessive White Lipochrome  is strikingly white colored. Recessive white canaries do not produce yellow coloring in the wings or body, instead the white color is snow white in the buff feathering but has a gray look in the yellow feathered recessive white. Since the buff is much whiter, it scores higher on the show bench. Buff feathered Recessive White shown.

A darling Columbus Fancy newly feathered chick! Is it Buff or Yellow Feathered? First right answer will be posted.

Friday, January 29, 2016

Breeding Better Looking Birds Part 4 - Feather Texture

The difference in a good bird and a show stopper is often feather texture. Feather texture gives the bird a competitive edge that makes it stand out among good birds!

Feather texture varies from feathers that are fine (thin) to coarse (wide) and greatly effects the way the feathers lay against the body.

Begin by identifying your birds plus and minus characteristics as compare to the show standard.  Male birds typically lose confirmation when they come into breeding condition and instead of its beautiful show shape becomes long and tubular looking. So you need to asses males especially before they come into breeding condition.

First divide them into buff or yellow feathering as a buff feathered bird should be bred to a yellow feathered bird and then consider the other feather variables giving preference next to feather length. If two birds have the same undesirable characteristic do not breed them together!

Breeding two birds that look just like the show standard usually results in lesser quality birds. Instead breeding is somewhat like painting. If you want to make a certain color of paint, you look at what you have and create it by blending opposites. The worst thing a breeder can do is cull birds that have any overly strong in one area and weak in another just because it is not "show quality". This could be just the stock bird you need to produce that show stopper.

For more information check out Learning & Sharing Article by Brian Johansen on this blog post Oct. 29, 2009 and Tony Ruiz and Ian Mesley articles Yorshires Champion, Breeder & Exhibitor Articles www.yorkshirecanary.com/article.htm

Tuesday, January 26, 2016

Breeding Better Looking Birds Part 3 - Second Set Of Feather Characteristics - Feather Length

Besides having pigment to the tip as in yellow feathering or not having pigment through to the feather tip as in buff feathers, feathers vary considerable in length from very short to very long.  When they are too long the tails are very long and the secondary flights are so long that they are not in line with the other wing feathers and even the body has long look when you judge total length from top of head to end of their tail.

Note the Secondary Flights are too long and not in line with other wing feathers
Look at the wing feathers certainly not in line!
Check out more information on long secondary flights and how to correct, see canary tales blog post  titled Wait Till Next Year September 14, 2009.

This Irish Fancy, a personable bird with an attitude, has short tight feathers so  that it  looks like a painted portrait rather than a photo of a live bird! Great feather texture too!
Very short feathers can give the feathers a very tight hugging the body look almost as tight as seen in some finches.

Monday, January 25, 2016

Breeding Better Looking Birds Part 2 Feather Type - Buff Feathering

Buff ticked Norwich
The  differentiation between the basic two feather type divisions yellow or buff is based on whether the pigmentation extends to the tip as in a yellow type feather or does not extend to the tip partially masking the body feathers ground color as in buff feathering. The effect is a frosting hue that is visible but varies considerable from heavy to very light. A microscope can also be used to see whether the pigment color extended to the tip or whether the tip or not.

Buff (feathering) Cinnamon Variegated Border
Buff (feathering) Green Foul Border

Silver (feathering) Cap Lizard
Buff Clear Irish Fancy (lower line is because she is coming into breeding and has a brood patch)
Red Ground Frost Note fine even frosting starting on head above eye and even throughout including the breast
Crested Red Ground Dark Crest Frost Stafford
Buff Green Variegated Parisian Frill
Buff (Non-Intensive) Green 3/4 Variegated Gloster Corona


Buff Green Variegated Scot Fancy
Buff Variegated Columbus Fancy Smooth Head


Sunday, January 24, 2016

Breeding Better Looking Birds - Part 1 Feather Type - Yellow Feathering

When I fail to win the best prize at a bird show, I spend some time comparing my bird to the best in the show and comparing them both to the standard. I always know when I am trouble because I immediately start planning next years breeding program and sometimes that is even four or five months away!

Honest Stock Assessment - Knowing where to improve and knowing what basic ingredients you have or need is critical and that includes recognizing differences in feather types. Its the type of feather that can influence the overall look of a bird.

There are six basic kinds to feathers and the first two division each has numerous names. Let's begin with identifying the first two feather types one is known as intensive (colorbred) or hard or non-frost (Staffords) or yellow (not the color at all - term used in most type canaries) or gold (lizards) feathering as opposed to the second feather type which is the opposite and is known frost (colorbred and Staffords) or buff (most type canaries) or  non-intensive or silver (lizards) feathering. A third type of colorbred feathering is Mosaic which is shown in other posts on this blog and is not covered in this post. For simplicity, in this post I will use the feather terms of most of the type canaries terms yellow feathering versus buff feathering.

First Yellow Feathering- Is a feather that regardless of its color, has its color right through to the very tip and give the bird a bright, intense, deeper color. Yellow feathering, a mutation from the original buff, is a dominant characteristic and in the typical breeding is heterozygous meaning the bird which has yellow type feathering has one gene for yellow feathering and one for buff feathering. When this bird with yellow feathering is paired with a buff feathered bird,  produces theoretically half yellow feathered canaries and half buff feathered canaries.

Yellow (referring to feather type not color) Cinnamon Variegated Border
Yellow (referring to feather type not color) Green 3/4 Dark Variegated Border

Yellow Intensive or Hard Feathered 3/4 Variegated Blue Gloster Corona
Red Ground (lipochrome color) Intensive (feather type)
Gold Cap Lizard
Yellow (in this case refers to feathering and color) Clear Irish Fancy
Clear Red Ground Grizzle Crested Non-Frost (feather type) Stafford

Yellow (feather type) Green Variegated Gibber Italicus Frill
Yellow (feather type) Green self Border


Sunday, January 17, 2016

Assessing Cock Vent Development

My target date for pairing is approximately March 8 but long before then it is important to assess how the cock birds vents are developing and adjust accordingly.

Male Number 1:

Click on these pictures and note the yellow fat layer building up which should it continue becomes and obstruction to mating. The vent itself shows good redness yet sides are parallel, so he is coming along but not ready at this point. We  certainly need to take control of his developing weight problem!

Male Number 2:

This cock has a red vent and abdomen and notice how the sides of the vent are rounding out rather than parallel like Male Number 1. He is getting ready nicely! Perhaps the sparing with other males helped him come into breeding condition even if he broke all his tail feathers and had to have them pulled so that new ones would come in to replace them!

Intervention:

Both these males came from the same cage with one other male, so even though conditions were the same, number 1 is too fat and number 2 needs to continue with current diet and exercise.

Number 1 needs calories reduced so he will be feed a lot of untreated grass seed (purchased from Wings and Things), some Blatner's Siskin Finch Mix (Bird Supply of New Hampshire) and plain canary mix (L'Avian Canary Plus) without added sunflower chips and uncooked regular human oatmeal. No more soft white bread each morning. Food will be only available from dishes on the floor. Water on high perch. Perches reduced in his cage from four to two and placed high in the cage to maximize exercise.

Two consecutive days a week I have added iodine in the water. I use vanodine 5 drops to a gallon of water. 24 hours after the first dose, I notice the lazy ones are more active.


Saturday, January 16, 2016

Danger of Wire Bottom Cages


Most of my breeding cages are the solid bottom and solid on three sides style. I have also a number of wire bottom larger cages that I have used for flights and for breeding.

Once I had a spraddle leg chick leave the nest in a wire bottom cage and he immediately was caught between the wire and broke a leg. After that experience, I always put several layers of paper over the wire to prevent youngsters from this hazard. It also works to completely fill the tray below the wire completely so that the youngsters can not perch on the bottom wire or fall through the wire.

When adults are housed in the wire bottom cages, I  had not had a problem in the five or more years I have used them until recently this Border male got both his wings caught between the wires on the floor bottom and was pinned there also damaging his foot. Luckily my daughter was cleaning the aviary at the time and notice him fairly soon after the accident. I was not home at the time so Sandy knew she must rescue him and carefully freed him and put him the carrier and called me.


I was concerned that he might never fly and perch again. To begin the rehabilitation, I agreed with Sandy's placing him in the new large carriers as this housing would assure he would not fly.  He held his wings pretty well in spite of the accident so I did not tape them with paper tape as I would if I thought they were seriously damaged.


Temporary Rehab Home

Notice how the bottom is covered with seed and oats so he doesn't want to perch.
Two weeks later, I moved him to a solid bottom cage with perches close to the ground. His wings looked fine but I noticed he was slipping on the perch.

I added a more narrow perch but what really worked was turning the perches side ways at about a 45 degree angle instead of the normal straight across position. Now he is using the foot normally and hopefully he will soon be strong enough to stand upright instead of squatting on the perch.

Should he not recover enough for breeding, he mentioned to me that he was volunteering for my artificial insemination project! It is so sad when a nice breeder gets old or hurt and is no longer able to mount a hen successfully and AI offers a way to still pass on his genes!


Wednesday, January 13, 2016

Trimming Beaks

Periodically, I check beaks and trim off any overhang which can interfere with cracking seed and eating.

Older Border Hen With Overgrown Beak

Using a Human Fingernail "Trim" Cutter, Gently Snip Off the Overgrowth.

Much Better!

Tuesday, January 12, 2016

Watching Demeanor - Changing Cages - But He Doesn't Look Happy?

When we move birds it is best to move all new members to the new cage at the same time. Otherwise the new member may be targeted by the establish residents. This is true whether we are caging 2 hens with one male or whether we are doing it to bring lagging males into condition faster or just reorganizing groups.

Even moving all at the same time so they all have an even start may still result in some that act shy and not at home in their new cage. Give it a couple of days, watch and see that the shy one is not being bullied or picked on.

Male lagging coming into breeding condition can benefit greatly by sparing with other males as long as the shy one changes its attitude in a couple days and is not being seriously attacked. It is sparing with males which along with lengthening day light hours, rather being with a hen, that brings cocks into breeding condition.

If after a couple of days a bird is still not happy, move to another cage preferably by itself. Failure to respond can result in severe weight loss which will result in hens not laying and males being infertile, scumming to illness and potentially death from being picked on its head till it bleeds or from illness.

So what about the Shy White Irish Fancy male?


Initial Reaction
Three Days Later

Hen Is Happy Too!
 More Assertive On His Way Toward Fatherhood!

Saturday, January 9, 2016

Irish Fancy Brood Patch Part 2 Hen Whose Ready When I'am Not!

Several Options are available:

Prevention - Try to minimize the damage from changing aviaries by making sure you have as close as possible to the same number of daylight hours and dimming. Consider light intensity too, was the bird in a high cage closer to the lights or bottom? And most important is not dropping the day length as this often precipitates a molt. My lights are on 11 hours per day with 30 minutes dimmer. Currently, I plan on breeding in March so when I need to I will be adjusting lighting 30 minutes per week so that I am at 14 hours plus 30 minutes dimming then.

Fixes - The best trick is to low the aviary temperature. Those of you with chicken experience know that dropping temperatures can stop or at least minimize hens laying.

For canaries, I like during pre-breeding to discourage laying by keeping the high at 63 to 65 F and at night let the temperature get down to at least 5 or more degrees lower. My aviary is separate from the house but does have a concrete floor which offers some heat. To keep it cooler, I am using a small vornado brand space heater safely placed far from cages near sink area and turning it on only when I get up in the morning and unplugging it at night when I go to bed. Our temperatures at night outside are generally mid to low 20 F with extremely cool temps to teens when we get an Arctic blast. Today is one of those cold blasts and aviary temperature high is 60 and tonight will be very cold.

Whenever you drop the temperature you must provide more calories as they will burn quite a few more just to keep warm. I add regular uncooked human porridge oatmeal free choice and soft white bread 1/4 slice per breeding size cage each morning in addition to their regular food and water offerings.

Another trick is to to move the hen to a new cage at a lower light level, facing a different direction if possible and with different style feeders than the one she was trying to nest in thus messing up her plans. Although having a nest is stimulating, I will give her a nest and material just to monitor how effective the previous changes are working. If she starts acting interested in the nest, I can drop temperature further.


Next, I go ahead and put a male that is not ready to breed in with her.  Over and over, I have had great success slowing the hen down in the early phase by pairing with a male who is not yet interested in breeding. If she is too far along, she will attack him but if peace prevails she will slow down and wait for him to make the first moves. If there is fighting, of course, this idea is abandoned. Once he starts feeding her, she will mate with him and move on normally. I have two possible males. One is much more ready than the other. I put the shy least ready fellow in and no courting is taking place. See his demeanor but she is being nice to him even if he suggests a platonic relationship!

So How is all this working?

Great, she is tolerating him and showing no interest in the nest!

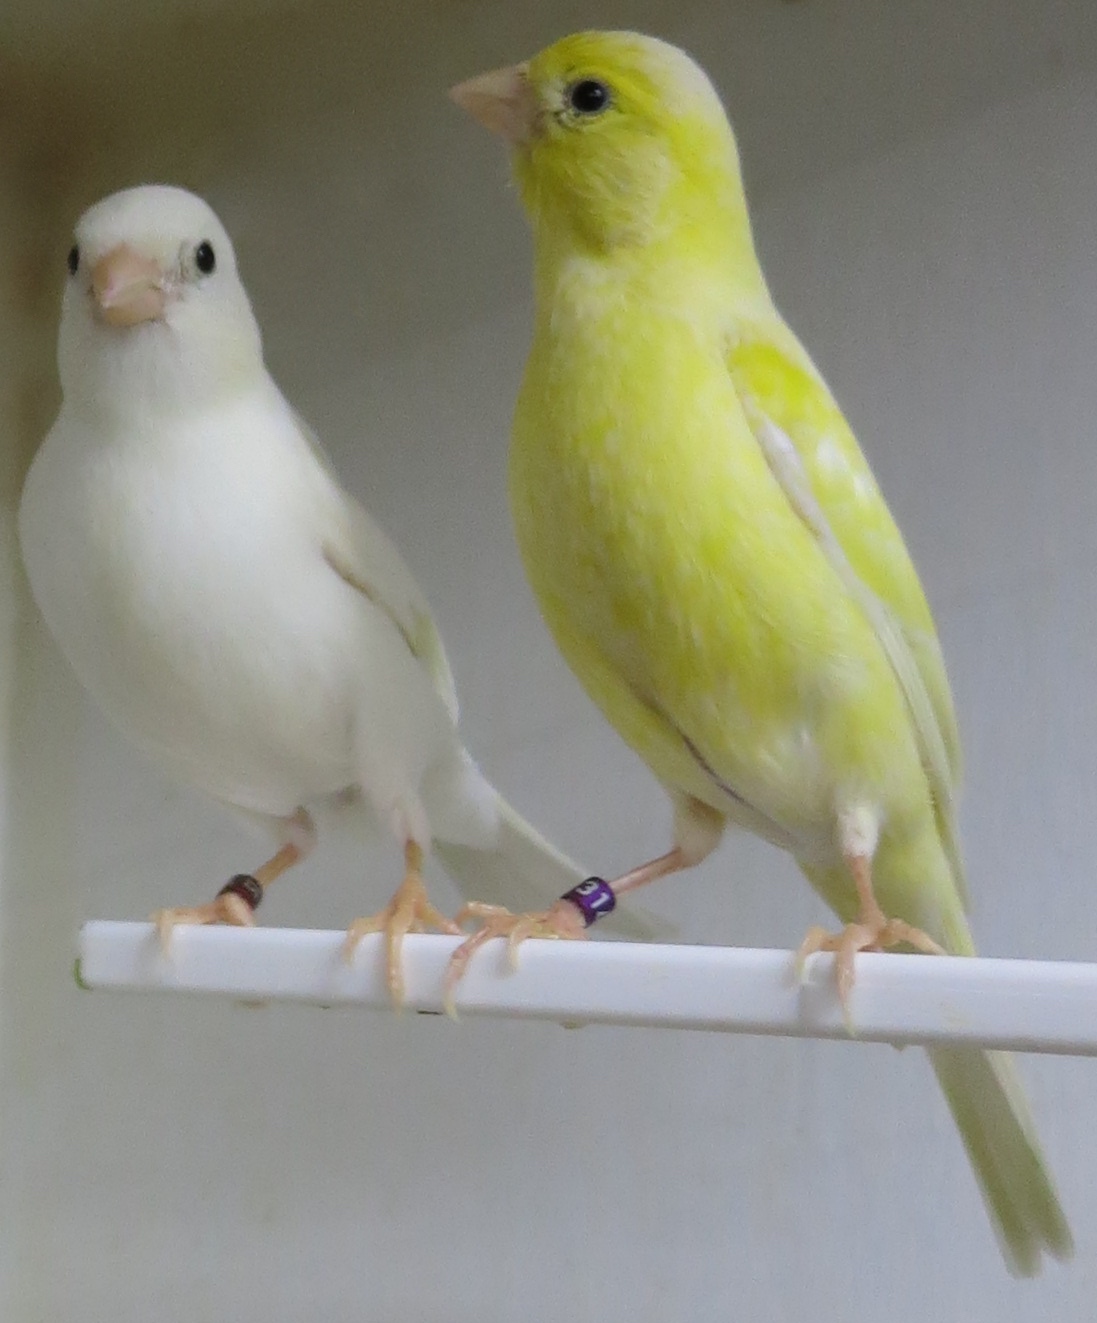
Note his demeanor in the two photos, shy silent type for now.

Providing support

The main support she needs is calcium. I have started her on calcium gluconate. I purchase it at Tractor Supply for about $6 per pint. It is 23% and sold to treat cattle. I use 2 Tablespoons to 1 gallon of water.  This will help her build up her calcium stores for egg laying but will not stimulate her to get ready for breeding. Once weekly they will get multiple vitamins in the water.

Normally, I start  ABBA Fertility E weekly on males six weeks before breeding and hens three weeks before breeding. None is given to hens after she lays the first egg. For this couple, I will wait till I see feeding behavior to start it or if they are not feeding at four weeks before I plan to breed, I will start them then. Hens often lay 3 to 4 weeks later. Any nestling food will not be offered till the vitamin E is started as at that time it is full speed ahead.

Update January 17, 2016

Working great so far! Male becoming more active and even seen him singing a bit! Hen shows no interest in the nest or sitting in a seed container identical to the one she was trying to sit in when I intervened.

Update February 8, 2016


Today she laid her first egg. The aviary temperatures has warmed a little as high outside are off and on around 56 F degrees. They seem to be getting along fine and I have seen him sing to her. So will see in two weeks. I am not taking eggs out as I have no place to hold them where the temperature is not low at night.

Update March 10, 2016
She hatched two chicks and feed them well. Papa was moved to another hen but will be back for a second round!